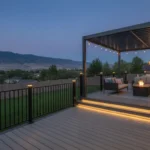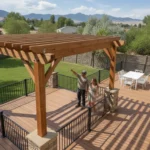
The satisfaction of a DIY project is hard to beat, and building a deck seems like a great weekend challenge. While laying the deck boards can be a rewarding task, the deck framing is a different story. This is the structural core of your entire project, and it’s where most DIY builds run into serious trouble. It involves more than just cutting wood; it requires understanding load capacities, local building codes, and how to create a foundation that can handle Utah’s unique soil and weather. Before you start, it’s crucial to understand the complexities. This guide will break down the process so you can decide if this is a job you should tackle yourself or if it’s time to call in a professional.
Key Takeaways
- A Strong Frame is Non-Negotiable: The safety and stability of your deck depend entirely on its hidden frame. For a solid feel underfoot, ensure the structure is built with proper load calculations and joists spaced no more than 16 inches apart.
- Make Moisture Protection a Priority: Water can ruin a wood frame, so a proactive defense is key. Use the right materials like pressure-treated lumber and corrosion-resistant screws, and always apply joist tape and flashing to create a waterproof seal that prevents rot.
- Do Your Homework Before You Build: Every safe deck project starts with a solid plan. This means checking local building codes, getting permits, and understanding your soil conditions. If you’re unsure about any step, working with a professional guarantees a safe, compliant, and long-lasting result.
What Is Deck Framing and Why Is It So Important?
Think of your deck’s framing as its skeleton. It’s the hidden network of posts, beams, and joists that supports everything you see on the surface. While the beautiful decking boards and stylish railings get all the attention, the frame is doing all the heavy lifting. Getting this part right isn’t just important; it’s everything. It’s the difference between a safe, long-lasting outdoor space for your family and a structure that could become wobbly, uneven, or even dangerous over time.
The quality of your deck’s frame directly determines its safety, stability, and lifespan. This isn’t just about nailing a few boards together; it involves a deep understanding of how to manage weight distribution, secure the structure to the ground, and protect it from Utah’s unique climate. Many DIY deck projects run into trouble because the complexity of proper framing is underestimated. A professionally built frame accounts for everything from the concrete footings buried deep in the ground to the precise spacing of the joists. This attention to detail ensures your custom deck can handle the weight of furniture, a grill, and all your favorite people. A solid frame is an investment in your home’s value and your family’s safety.
The Foundation of Your Deck’s Structure
So, what exactly makes up this all-important frame? At its core, deck framing is the structural foundation built from several key components working in harmony. It consists of posts, which are the vertical supports that carry the deck’s weight to the ground; beams, which are the main horizontal supports that rest on the posts; and joists, which are smaller boards that run across the beams to create the surface your decking will attach to. If your deck is attached to your house, it will also include a ledger board, which securely fastens the frame to your home’s foundation. Together, these elements form a rigid grid that provides all the strength and stability for your outdoor living space.
How Framing Affects Safety and Longevity
The connection between proper framing and deck safety is incredibly direct. Even small missteps in design or assembly can compromise the entire structure. For example, using undersized joists or spacing them too far apart can lead to a bouncy, sagging deck surface. Improperly installed footings can cause the deck to shift or settle over time, while a poorly attached ledger board is one of the leading causes of deck collapse. This is where professional expertise becomes invaluable. As licensed and insured contractors, we understand the engineering principles and local building codes required to build a frame that lasts. A professionally built frame gives you peace of mind, knowing your deck is a secure retreat for decades to come.
Anatomy of a Deck Frame
Before you can build a sturdy deck, you need to know the key players. Think of a deck frame like a skeleton; each part has a specific job to do to hold everything together. Understanding these components will make the entire framing process much clearer, whether you’re tackling it yourself or working with a professional. It helps you appreciate the skilled craftsmanship that goes into a safe, long-lasting outdoor space. Let’s break down the essential components of a deck frame so you know exactly what you’re looking at.
Posts
Posts are the strong vertical supports that anchor your deck to the ground. Think of them as the legs of the structure. They are set into concrete footings and are responsible for transferring the entire weight of the deck, plus everyone on it, safely into the earth. Getting the posts right is non-negotiable for structural integrity, as they ensure your deck remains stable and secure for years of backyard barbecues and quiet mornings. The proper placement and installation of posts are fundamental to any custom decking project, forming the literal foundation for your outdoor oasis.
Beams
Beams, sometimes called girders, are the main horizontal support members that rest on top of the posts. These thick, strong boards run parallel to the house and carry the weight of the joists. Essentially, the beams create a level and sturdy platform for the rest of the frame to be built upon. Typically made from multiple pieces of treated lumber fastened together, beams are engineered to handle significant loads without sagging. Their size and placement are critical calculations in deck design, ensuring the structure can easily support the floor system and everything that goes on top of it.
Joists
Joists are the repetitive, parallel boards that sit on top of the beams. They create the immediate framework that your deck boards will be fastened to. For a solid, bounce-free surface, joists are typically spaced 16 inches apart “on-center,” meaning the distance from the center of one joist to the center of the next is 16 inches. This standard spacing provides robust support for the decking and ensures a uniform, stable floor. The entire system of joists works together to distribute weight across the beams, making them a crucial part of your deck’s overall structural design.
Ledger Board
The ledger board is the piece of the frame that attaches the deck directly to your house. It’s fastened securely into the house’s rim joist with heavy-duty structural screws, making it one of the most critical connections for a deck’s stability. Because it creates a seam between the deck and your home, proper waterproofing is essential. A layer of metal flashing is always installed over the top of the ledger board to direct water away from the house, preventing moisture from seeping in and causing rot or structural damage. This step is vital for protecting both your deck and your home.
Rim Joists and Blocking
Rim joists are the finishing pieces of the frame that run along the outside perimeter, capping the ends of all the other joists. They essentially create a “picture frame” around the joist system, tying everything together for a clean look and added strength. For even more rigidity, small pieces of lumber called “blocking” are installed between the joists. Blocking prevents the long joists from twisting or warping over time and adds an extra layer of stability to the entire structure. This is especially important for attaching custom railings, as it provides a solid mounting surface for the rail posts.
What Are the Best Materials for Deck Framing?
Building a strong, long-lasting deck starts with choosing the right materials for its frame. Think of the frame as the skeleton of your deck; if it’s not built with durable, high-quality components, the entire structure is at risk. It’s not just about the wood, either. Every screw, bolt, and protective barrier plays a vital role in ensuring your deck can withstand Utah’s diverse weather for years to come. Let’s walk through the essential materials you’ll need for a solid foundation that you can trust. When you invest in quality from the ground up, you’re investing in safety and peace of mind for every moment you spend enjoying your outdoor space.
Pressure-Treated Lumber
When you’re building a deck frame, pressure-treated lumber is the go-to choice for a reason. This wood is chemically treated to resist moisture, rot, and insect damage, which is exactly what you need for an outdoor structure. For the best results, look for lumber that is rated for “ground contact.” This ensures it has the highest level of protection, making it perfect for the posts and any part of the frame close to the soil. Some modern pressure-treated woods even use advanced copper-based treatments that are more effective against fungi and safer for the people, pets, and plants in your yard.
Corrosion-Resistant Hardware
The hardware you use is just as important as the lumber. The chemicals that make treated wood so durable are also highly corrosive to standard steel. If you use regular screws or nails, they can rust and fail in just a few years, compromising your deck’s structural integrity. That’s why all your metal hardware, from screws and bolts to joist hangers, must be rated for use with treated lumber. Look for fasteners that are hot-dip galvanized or, for even better protection, made of stainless steel. Using the right corrosion-resistant hardware ensures every connection in your deck frame stays strong and secure for the long haul.
Essential Protection: Joist Tape and Flashing
A couple of extra steps can make a huge difference in how long your deck frame lasts. First, apply a self-adhering butyl tape to the tops of your joists and beams. This simple addition, often called joist tape, creates a waterproof barrier that prevents moisture from seeping into the wood, which is the leading cause of rot. Second, proper flashing above the ledger board is non-negotiable. This piece of metal directs water away from the intersection of your deck and your house. Without it, water can get trapped behind the ledger, leading to serious rot in both your deck frame and your home’s structure.
Plan Your Deck Frame Before You Build
Before you even think about cutting a single piece of lumber, you need a solid plan. The planning phase is where a beautiful, long-lasting deck truly takes shape. Rushing this step is the number one reason DIY projects go wrong, leading to wasted materials, budget overruns, and a whole lot of frustration. A well-thought-out plan ensures your deck is not only safe and structurally sound but also perfectly suited to your home and lifestyle. This is where we, as professionals, spend a significant amount of time, because we know that careful preparation is the key to a flawless result.
Thinking through every detail beforehand, from local regulations to the specific conditions of your yard, sets the stage for a smooth building process. It allows you to anticipate challenges and solve them on paper, which is much easier than trying to fix them mid-construction. Whether you’re planning a simple platform deck or an intricate multi-level design, taking the time to map out your frame will pay off. If you want a partner in this critical stage, our custom deck design services can help you create the perfect blueprint for your dream outdoor space.
Check Local Building Codes and Permit Requirements
Before you start, you absolutely must check your local building codes. These aren’t just suggestions; they are legal requirements that ensure your deck is safe for your family and friends. Regulations can vary quite a bit between Utah communities, so what’s required in Salt Lake County might be different from the rules in Wasatch or Summit County. These codes will dictate everything from footing depth and joist spacing to railing height. It’s crucial to check local building codes and secure any necessary permits before you begin. Skipping this step can result in fines or even having to tear down your hard work.
Assess Your Ground and Soil Conditions
Your deck is only as stable as the ground it stands on. Here in Utah, we have a wide range of soil types and terrain, from flat valley floors to sloped mountain properties. A professional contractor will always start by assessing the soil to determine the best way to create a solid foundation. If the ground is loose, soft, or on a slope, standard concrete footings might not be enough. In these cases, we might use helical piers to anchor the deck securely. This step is essential for preventing your deck from shifting, sinking, or becoming unstable over time, ensuring its safety and longevity for years to come.
Measure, Square, and Lay Out Your Deck’s Footprint
Once you have a design, it’s time to lay out your deck’s footprint in your yard. This helps you visualize the final size and placement. One of the most important parts of this step is making sure your layout is perfectly square. A common carpenter’s trick is to measure the diagonals of your rectangular layout. If the two diagonal measurements are equal, your corners are true 90-degree angles. This simple technique is vital for structural integrity and ensures your decking boards will line up correctly. Getting your framing and construction right from the start makes the rest of the build go much more smoothly.
Calculate Your Deck’s Load Capacity
A deck needs to support more than just its own weight. It has to safely hold you, your family, friends, furniture, a grill, and even heavy snow loads during our Utah winters. Calculating your deck’s load capacity involves determining the right size and spacing for your posts, beams, and joists to handle these forces. Many DIY builders underestimate the complexity of this step, which can lead to a deck that sags or, in the worst-case scenario, collapses. Accurately calculating the load is not just about appearance; it’s a critical safety measure that protects everyone who uses your deck.
How to Frame a Deck: A Step-by-Step Guide
Building a deck frame is the most critical part of your entire project. It’s the skeleton that supports everything, so getting it right is non-negotiable. While it requires precision and some heavy lifting, breaking it down into clear steps makes the process much more approachable. Follow this guide to understand how a sturdy, safe, and long-lasting deck frame comes together. If you’re planning a project in Utah and want to ensure every step is handled with professional care, our team is always ready to help with your custom decking needs.
Step 1: Dig Your Post Holes
First things first, you need a solid foundation. This starts with digging the post holes. The depth and diameter of these holes are crucial for stability, and the requirements can change based on your local climate and soil. Before you pick up a shovel, you must check with your local building department for specific guidelines in your area. Getting this step right ensures your deck will stand strong for years, preventing issues with shifting or sinking down the line. This isn’t a step where you want to guess, so always confirm the local code.
Step 2: Pour Concrete Footings
With your holes dug, it’s time to pour the concrete footings that will anchor your posts. After mixing the concrete, pour it into the holes around your set posts. One pro tip is to shape the top of the concrete so it slopes away from the post. This small detail is a big deal, as it helps water drain away instead of pooling around the base of the wood, which prevents rot and decay over time. Let the concrete cure completely according to the manufacturer’s instructions before moving on to the next step.
Step 3: Cut and Set Your Posts
Once the concrete is fully cured, you can set the final height for your deck frame. Use a laser level to mark a perfectly level line across all of your posts; this line represents the bottom of your beams. To ensure a straight cut, use a speed square to extend that mark all the way around the post. A clean, level cut here is essential because it creates a flat surface for your beams to rest on, ensuring the entire frame is level and stable. Take your time with this step, as precision is key.
Step 4: Install the Ledger Board and Flashing
If your deck is attached to your house, the ledger board is one of the most important structural elements. This board is mounted directly to your home’s framing and carries a significant portion of the deck’s weight. Secure it with specialized ledger lock bolts, not standard screws or nails. To prevent water from seeping between the ledger and your house, which can cause serious damage, you must install a piece of metal or vinyl called flashing. This is a critical safety measure that protects the integrity of both your deck and your home.
Step 5: Set the Beams
The beams are the main horizontal supports that rest on top of your posts and carry the weight of the joists and decking. For extra strength, it’s a great practice to create your beams by laminating two 2×12 boards together. You can do this by applying construction adhesive between the boards, then using screws to pull them tightly together before securing them with nails along their entire length. This creates a much stronger and more rigid beam than a single piece of lumber, providing robust support for your deck structure.
Step 6: Install the Joists
Joists are the repetitive framing members that run parallel to each other, sitting on top of the beams and creating the main platform of your deck. The standard spacing for joists is 16 inches “on-center,” which means the distance from the center of one joist to the center of the next is 16 inches. This spacing provides excellent support for most decking materials and creates a strong, solid feel underfoot. Use joist hangers to attach the joists securely to the ledger board and rim joists for a sturdy connection.
Step 7: Add Rim Joists and Blocking
To complete the outer perimeter of your frame, you’ll install rim joists. These are the boards that run perpendicular to your main joists and cap off the ends, boxing in the entire structure. This not only gives the frame a clean, finished look but also adds to its lateral stability. For even more rigidity, especially on larger decks, you can install blocking. These are short pieces of lumber fitted snugly between the joists in the middle of the span. Blocking helps prevent the joists from twisting or warping over time.
Step 8: Protect the Frame with Joist Tape
Before you start laying down your beautiful new deck boards, there’s one final step to protect your hard work. Apply a self-adhering joist tape to the top edge of all your joists and beams. This special tape creates a waterproof barrier that protects the wood from moisture that can get trapped between the decking and the frame. It’s a simple, inexpensive step that can dramatically extend the life of your deck’s frame by preventing rot and decay, ensuring your outdoor space remains safe and beautiful for decades.
What Is the Right Joist Spacing for a Deck?
Getting the joist spacing right is one of the most important parts of building a deck that feels solid and safe underfoot. Think of joists as the ribs of your deck’s skeleton; they are the parallel boards that run between beams and support the decking surface. The distance between these joists is what we call “joist spacing,” and it’s a measurement that has a huge impact on your deck’s performance. While local building codes provide minimum requirements, building a high-quality deck often means going beyond those basics.
The right spacing depends on the type of decking material you use, the thickness of the boards, and the pattern you plan to lay them in. Getting this detail wrong can lead to a bouncy, uneven surface or, in the worst-case scenario, a structural failure. Let’s walk through the standards and why they matter for the longevity and enjoyment of your outdoor space.
The 16-Inch On-Center Standard
For most standard deck builds, the go-to rule is to space joists 16 inches “on-center.” This means the distance from the center of one joist to the center of the next is exactly 16 inches. While some codes might permit 24-inch spacing, we find it often results in a deck that feels spongy or bouncy when you walk on it. Sticking to the 16-inch standard provides superior support for the deck boards, creating a much more solid and stable surface. It’s a non-negotiable part of the custom decking services we provide because quality starts with the frame.
When to Adjust Spacing for Diagonal Decking
If you’re planning a more decorative look with boards laid in a diagonal pattern, you’ll need to adjust your joist spacing. Because the deck boards travel a longer distance between supports when they’re angled, the joists must be closer together. For diagonal decking, it’s best practice to reduce the spacing to 12 inches on-center. This ensures each board has the proper support to prevent sagging and flexing over time. The same logic applies to certain composite decking materials, which often have their own specific spacing requirements from the manufacturer. Always check the guidelines for your chosen material.
Why Spacing Is Critical for Safety
Proper joist spacing is about more than just how the deck feels; it’s a critical safety measure. A frame with joists that are too far apart won’t adequately support the weight of people, furniture, and even snow. Over time, this can cause the deck boards to warp or crack. While using fewer joists might seem like a way to save a little money on lumber, the extra cost for proper spacing is minimal compared to the overall project budget. Investing in a properly spaced frame is the best way to guarantee your deck is a safe, durable structure you can enjoy for years. You can see the sturdy results of this approach in our project gallery.
How to Protect Your Deck Frame for Years to Come
Building a solid deck frame is a major milestone, but the work isn’t quite done. To make sure your outdoor space lasts for decades, you need to protect the frame from the elements. Water and instability are the two biggest threats to a wooden structure. Fortunately, a few key steps can safeguard your investment, ensuring your deck remains a safe and beautiful extension of your home for years to come. Taking these protective measures seriously is what separates a good deck from a great one.
Guard Against Moisture with Flashing and Tape
Moisture is the number one enemy of a wood deck frame. The best way to fight back is with a two-part defense: flashing and joist tape. Think of butyl flashing tape as a waterproof seal for the tops of your joists and beams. It prevents water from seeping into the wood, especially around screw holes, which is a primary cause of rot. Just as important is the flashing installed above the ledger board. This piece directs water away from the connection point between your deck and your house, protecting your home’s structure from serious damage. Proper moisture protection is a non-negotiable part of our custom decking services.
Ensure Proper Airflow Beneath the Deck
A deck needs to breathe, especially the frame underneath. Trapped moisture creates a damp, humid environment where fungus and rot can thrive. This is particularly true for ground-level decks. Ensuring there is enough space for air to circulate freely beneath the deck helps everything stay dry. Good ventilation wicks away moisture from rain or snowmelt, extending the life of the wood and maintaining its strength. When designing your deck, plan for at least a few inches of clearance and avoid closing off the underside completely without adding vents. You can see examples of well-ventilated designs in our project gallery.
Add Knee Bracing for Stability
If your deck is more than a few feet off the ground, you’ll want to add knee bracing for extra stability. These are angled supports that connect the posts to the beams, forming a triangle that resists side-to-side movement. Knee bracing makes a tall deck feel much more solid and secure underfoot, preventing swaying, especially in strong winds or during a lively backyard party. It’s a simple addition that dramatically improves the structural integrity and safety of your deck. This focus on stability is the same principle we apply to our strong and secure custom railing services.
Common Deck Framing Mistakes to Avoid
Building a strong deck frame is all about getting the details right. Even small missteps can lead to big problems down the road, affecting everything from your deck’s stability to its lifespan. Whether you’re tackling this as a DIY project or just want to know what to look for in a contractor, understanding these common pitfalls is key. A wobbly surface, premature rot, or even a structural failure can often be traced back to a handful of preventable errors made during the framing stage. It’s the skeleton of your deck, and if the bones aren’t good, the whole structure is compromised.
We’ve seen it all over the years, from frames built with undersized lumber to those missing critical moisture protection. These aren’t just cosmetic issues; they are fundamental safety concerns. Getting the framing right means your deck will feel solid underfoot, stand up to Utah’s weather, and provide a safe place for your family to gather for years to come. Below, we’ll walk through the most frequent framing mistakes we see and explain how to avoid them. Paying attention to these details will help you build with confidence or hire a contractor who truly knows their craft.
Skipping Permits
It can be tempting to bypass the permit process to save time and money, but this is one of the riskiest shortcuts you can take. Building permits aren’t just bureaucratic red tape; they ensure your deck meets local safety codes designed to protect you and your family. DIY builders often underestimate the structural complexities, and a project that isn’t up to code can be a serious liability. A professional contractor will handle the entire permitting process for you. As a licensed and insured company, we make sure every project is fully compliant, giving you peace of mind that your deck is built correctly from the ground up.
Using the Wrong Materials
Your deck’s frame is only as strong as the materials you use to build it. This goes beyond just the lumber. It’s crucial to use corrosion-resistant fasteners and hardware specifically designed for outdoor use with pressure-treated wood. Another common mistake is failing to account for your specific ground conditions. Professionals start by assessing the soil to determine the best foundation. For instance, loose or sloped soil might require deeper concrete footings or helical piers to create a stable base. Choosing the right materials from the very beginning is a core part of our custom decking services and prevents premature decay and structural failure.
Ignoring Moisture Protection
Wood and water don’t mix, and protecting your deck’s frame from moisture is non-negotiable for its longevity. One of the most vulnerable areas is the top of the joists, where water can pool and slowly cause rot. Applying a specialized joist tape creates a waterproof barrier that can add years to the life of your frame. Similarly, installing proper flashing where the deck attaches to your house (the ledger board) is critical for preventing water from seeping into your home’s structure. These protective measures are a standard part of our building process because we know they are essential for creating durable, long-lasting outdoor structures.
Undersizing Beams, Posts, or Joists
A deck frame needs to be strong enough to support the weight of furniture, grills, and people. A common mistake is using undersized lumber or spacing joists too far apart to cut costs. While a calculator might say 24-inch joist spacing is technically strong enough, it often results in a deck that feels bouncy and unstable underfoot. We stick to the 16-inch on-center standard to create a solid, rigid surface. Properly sizing beams and posts is just as important for distributing the load safely. Getting these calculations right is a job for a pro, ensuring your deck is not only beautiful but also structurally sound, just like the projects in our gallery.
Should You DIY Your Deck Frame?
Tackling a DIY project can be incredibly rewarding, and building your own deck frame might seem like a great way to save some money. But before you head to the lumber yard, it’s worth taking a serious look at what the job entails. Deck framing is the structural backbone of your entire outdoor space. If it’s not done perfectly, the safety and longevity of your deck are at risk.
Many enthusiastic homeowners underestimate the complexity involved in deck construction. It’s more than just cutting wood to the right length. You have to account for Utah’s unique terrain, soil conditions, and local building codes. A small miscalculation in joist spacing, for example, can make your deck feel bouncy and unstable, even if it technically meets code. Pros often stick to 16-inch spacing for a solid feel, a detail a DIY guide might not emphasize.
Hiring a professional isn’t just about fixing mistakes; it’s about preventing them from happening in the first place. A licensed and insured contractor handles everything with precision, from the initial design to the final inspection. If you’re feeling unsure about creating a safe, beautiful, and long-lasting foundation for your deck, bringing in an expert is the smartest move you can make. Our team specializes in custom decking services that ensure your project is built right from the ground up.
Frequently Asked Questions
Do I really need a permit just to build a deck? Yes, in almost all cases, you do. Think of a permit as a safety check for your project. It ensures your deck is designed and built to handle everything from a summer barbecue to a heavy Utah snowstorm. The process confirms that your plan follows local codes for things like footing depth, railing height, and structural connections. A professional contractor will manage this for you, but if you’re building yourself, it’s a step you can’t afford to skip. It protects your family, your home’s value, and you from potential fines.
My current deck feels a little bouncy when I walk on it. Is that a framing problem? A bouncy or spongy feeling is a classic sign of a framing issue. It usually means the joists (the boards that support your deck’s surface) are either spaced too far apart or are not large enough for the span they cover. While the standard is 16 inches between joists, some builders cut corners and go wider, which creates that unstable feeling. It’s definitely something to have looked at, as it indicates the frame isn’t distributing weight properly.
Is it really necessary to use materials like joist tape and special hardware? Absolutely. These materials are your frame’s best defense against its two biggest enemies: water and time. The chemicals in pressure-treated wood will corrode normal screws, causing connections to fail. Using corrosion-resistant hardware is essential for structural integrity. Joist tape is a simple, waterproof barrier that protects the tops of your joists from moisture, which is the primary cause of rot. Spending a little extra on these items is a small investment that can add decades to the life of your deck.
How does Utah’s weather affect how a deck frame should be built? Utah’s climate plays a huge role in proper deck design. First, our heavy snows add a significant amount of weight, so the frame’s load capacity must be calculated to handle it. This influences the size and spacing of your beams and joists. Second, our diverse soil conditions, from clay in the valleys to rockier ground in the mountains, determine how the footings must be built. A stable foundation here might require deeper footings or different techniques than in other parts of the country.
What’s the single most important part of building a deck frame? If I had to pick one, it would be the foundation, which includes the footings and the ledger board. The footings anchor the entire structure to the ground, preventing it from shifting or sinking. The ledger board is what secures the deck to your house, and it’s the site of most major deck failures when installed incorrectly. Getting these two connections right is critical for safety and stability. A solid plan that correctly maps out this foundation is the true starting point for a deck that lasts.