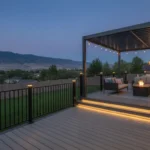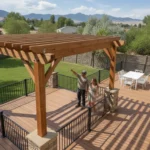
Building an outdoor structure in Utah means preparing for some serious weather. From intense summer sun and dry heat to heavy winter snow, our climate puts any deck to the test. Choosing the right materials and using the proper building techniques isn’t just a good idea; it’s essential for a deck that lasts. This guide is specifically designed for Utah homeowners, focusing on the methods and materials that stand up to our unique environment. We’ll cover everything from digging footings below the frost line to selecting decking that resists UV damage. Proper deck construction here requires local knowledge, and we’re here to share it.
Key Takeaways
- Thoughtful Planning Prevents Problems: Before you build, create a detailed plan that includes a realistic budget, a layout designed for how you’ll actually use the space, and the required permits from your local Utah municipality.
- A Strong Foundation is Non-Negotiable: Ensure your deck is safe and stable by digging footings below the frost line, correctly installing the ledger board with proper flashing, and choosing materials that can handle Utah’s intense weather.
- Finishing Details and Maintenance Matter: Protect your investment by using the right exterior-grade fasteners, leaving gaps between boards for drainage, and performing seasonal inspections to keep your deck safe for years of enjoyment.
How to Plan Your Deck Project
A beautiful, sturdy deck begins long before you pick up a hammer. The planning phase is where your vision takes shape and where you can prevent the most common and costly mistakes. Rushing this step can lead to a deck that’s too small, poorly placed, or doesn’t fit your lifestyle. Taking the time to think through the details ensures your finished project is a space you’ll love for years. A solid plan covers everything from the big picture to the smallest details, giving you a clear roadmap for your entire build.
Before you start, it’s helpful to gather inspiration and see what’s possible. Exploring different deck designs can spark ideas for layouts, materials, and features you might not have considered. Think about how your new deck will connect with your home and yard, creating a seamless transition between your indoor and outdoor living areas. This initial research will help you make informed decisions as you move forward with your own custom plan.
Choose Your Location, Design, and Layout
First, decide where your deck will go and how you want to use it. Will this be your go-to spot for grilling and dining, a quiet corner for morning coffee, or a large platform for entertaining guests? Your intended use directly influences the size, shape, and flow of the space. Grab a tape measure and head outside. Mark the potential footprint with stakes and string to get a real-world feel for the size.
Consider furniture placement and how people will move around. You’ll want enough room for chairs, a table, and clear pathways without feeling cramped. Also, think about future additions. Do you dream of adding a pergola for shade or built-in seating down the road? Planning for these features now will make integrating them later much easier.
Set a Realistic Budget
Creating a budget isn’t about limiting your dream; it’s about making it achievable. A realistic budget is your financial guide, helping you make smart decisions on materials, size, and features without unexpected financial stress. Start by researching the costs of different decking materials, as this will be your biggest expense. Don’t forget to factor in the price of hardware, concrete for footings, permits, and any tools you may need to rent or buy.
It’s always a good idea to add a contingency fund of about 10% to 15% to your total budget. This buffer will cover any unforeseen costs or small changes you decide to make along the way. Having this financial cushion provides peace of mind and keeps your project on track without compromising on quality.
Do You Need a Permit to Build a Deck in Utah?
Yes, in most cases, you will need a permit to build a deck in Utah. Local building codes require permits for most deck projects, especially if the deck is attached to your house or is more than 30 inches above the ground. Securing a permit isn’t just about following rules; it’s a critical step for ensuring your deck is safe and structurally sound. The permitting process helps you catch potential issues, like violating a zoning code, before you even start building.
To get started, contact your local city or county building department. They can provide the specific requirements and applications for your area. As a licensed and insured contractor familiar with the various regulations across Utah communities, we know that following these codes is essential for a successful and safe project.
What Are the Best Materials for Deck Construction?
Choosing the right material for your deck is one of the biggest decisions you’ll make. It affects everything from your budget and project timeline to the deck’s final look and how much time you’ll spend on maintenance. The three main players are pressure-treated wood, natural woods like cedar, and modern composite decking. Each has its own set of benefits, so the best one for you really comes down to your budget, style, and how you feel about yearly upkeep.
Before you get your heart set on a specific look, it’s smart to understand what goes into building with each material. While some are more forgiving for a DIY project, others require special tools and techniques to get right. Exploring different custom decking services can give you a great idea of what the pros use and why. Thinking through these options now will save you from headaches later and ensure you build a deck you’ll love for years to come.
Pressure-Treated Wood
Pressure-treated (PT) lumber is the go-to material for most deck frames, and for good reason. It’s affordable, widely available, and chemically treated to resist rot, fungus, and wood-boring insects. For the structural parts of your deck, like the posts and joists, you should always use pressure-treated lumber rated for ground contact. This ensures your deck’s foundation is solid and protected from moisture in the soil.
While it’s a budget-friendly choice for decking boards, PT wood does require consistent maintenance. It’s prone to cracking, splitting, and warping if it isn’t cleaned and sealed or stained regularly. If you’re up for the annual upkeep, it’s a reliable option that gives you a classic wood deck without the high price tag of cedar or redwood.
Cedar and Redwood
If you love the rich, natural look of wood, cedar and redwood are beautiful choices. These woods contain natural oils and tannins that make them inherently resistant to rot and insects. Cedar is a popular option that’s strong and stunning, but it can splinter and needs yearly staining to protect it from the elements and maintain its color. Without it, it will weather to a silvery gray.
Redwood is another excellent choice, known for its deep color and durability. Both cedar and redwood are more expensive than pressure-treated pine, but their natural beauty is hard to beat. You can see some incredible examples of how these woods look in a finished project by browsing a professional gallery. Just be prepared for the commitment to regular maintenance to keep them looking their best.
Composite Decking (Including Trex)
For a low-maintenance alternative to wood, composite decking is an amazing option. It’s an innovative product made from a blend of recycled plastic and wood fibers. The biggest advantage of composite decking is that it doesn’t shrink, splinter, or fade like traditional wood. It’s designed to last for decades with minimal upkeep, requiring just an occasional cleaning with soap and water. No sanding, staining, or sealing is ever needed.
While the upfront cost is higher than wood, many homeowners find the long-term value worth it. Brands like Trex offer a huge variety of colors and finishes, from realistic wood grains to modern monochromatic tones. Because companies like Dynamic Deck Pros also use these materials for custom fencing, you know it’s a durable product built to withstand the outdoors.
Which Materials Hold Up Best in Utah’s Climate?
Living in Utah means your deck has to endure some serious weather extremes, from intense summer sun and dry heat to heavy winter snow and freeze-thaw cycles. These conditions can be tough on outdoor structures, so choosing the right material is critical. Using untreated or improperly rated lumber can lead to premature rot and warping, which could compromise the safety of your deck.
Pressure-treated wood works well for framing in any climate, but for decking, it will demand consistent sealing to protect it from Utah’s harsh UV rays and moisture. Cedar and redwood also need to be sealed to prevent sun and water damage. For a truly resilient deck, composite material is often the top performer in our climate. It resists fading from the high-altitude sun, won’t absorb moisture from melting snow, and handles temperature swings without warping or cracking. As a local Utah business, we’ve seen firsthand how well it performs from Cache County to Utah County.
How to Build a Solid Deck Foundation and Frame
Think of your deck’s foundation and frame as its skeleton. It’s the unseen hero that supports everything from the decking boards you walk on to the furniture you relax on. Getting this stage right is absolutely critical for the safety and longevity of your outdoor space. A wobbly or unstable deck isn’t just annoying; it’s a serious hazard. This is where the real structural work happens, and mistakes made here are the hardest and most expensive to fix later on.
Building a solid foundation involves several key steps, each one as important as the last. You’ll start by digging footings deep enough to sit below Utah’s frost line, which prevents the ground from shifting your deck with the seasons. If your deck is attached to your house, you’ll need to install a ledger board correctly to create a secure connection. From there, you’ll build the frame with posts and joists, paying close attention to spacing and using the right hardware. While it’s tempting to rush to the more visible parts of the project, spending time and care on the frame ensures your deck will be a safe, stable retreat for years. A strong frame is the base for all your other beautiful custom deck features, so let’s walk through how to do it right.
Dig and Set Footings Below the Frost Line
A deck is only as strong as its foundation, and that foundation starts with the footings. In Utah, where we have cold winters, you must dig your footing holes below the local frost line. This is the depth at which the ground freezes. If your footings are too shallow, moisture in the soil can freeze, expand, and heave your deck upward, causing it to become unstable and uneven. The exact frost line depth varies across Utah’s counties, so always check your local building codes before you start digging. Once your holes are dug, you’ll fill them with concrete to create a stable base for your support posts.
Install the Ledger Board Correctly
If you’re building a deck that attaches to your home, the ledger board is one of the most important structural elements. This long board fastens directly to your house and supports the entire side of the deck. An improperly attached ledger board is a leading cause of deck collapse. It must be secured with structural screws or lag bolts, never just nails, which can pull away over time. It’s also vital to install flashing, a thin piece of waterproof material, between the ledger and your house. This prevents water from seeping in and causing rot, which could damage both your deck and your home’s structure.
Frame the Deck for Stability
With your footings and ledger board in place, it’s time to build the frame. This includes the support posts and the joists that will hold up your decking. One common mistake is burying pressure-treated wood posts directly in the soil, where they can rot or be damaged by insects. Instead, your concrete footings should extend about six inches above the ground. You can then attach the posts to the footings using galvanized post anchors. This keeps the wood away from constant moisture and ensures your deck’s support system remains solid. You can see examples of sturdy, well-built frames in our project gallery.
Follow Joist Spacing and Support Guidelines
Joists are the horizontal beams that run from the ledger board to the outer edge of the frame, creating the grid that your decking boards will rest on. The spacing between your joists is determined by the type and thickness of your decking material. Placing them too far apart will result in a deck that feels bouncy or sags over time. Always follow the manufacturer’s guidelines for spacing. To connect the joists to the frame, use galvanized joist hangers and exterior-rated structural screws. As noted by experts at Decks.com, nails are simply not strong enough to handle the weight and can pull out easily.
Installing Deck Boards, Railings, and Finishes
With a solid frame in place, you’re ready for the most satisfying part of the build: installing the surfaces that will transform your structure into a beautiful, functional deck. This is where your design choices come to life. Paying close attention to detail during this stage is key to ensuring your deck not only looks great but also stands up to Utah’s weather for years to come. Let’s walk through the finishing steps.
Lay the Decking Boards
Now it’s time to create the floor of your outdoor oasis. Start laying your decking boards from one side, either against the house or at the outer edge, and work your way across the frame. You can use traditional face screws for a classic look or opt for hidden fasteners for a clean, seamless surface. Whichever you choose, be sure to leave a small, consistent gap between each board. This isn’t just for looks; it’s essential for allowing water to drain and giving the wood room to expand and contract with temperature changes. Getting the decking installation right is what makes the final product shine.
Consider Spacing, Fasteners, and Drainage
Standing water is a deck’s worst enemy, leading to rot, mold, and slippery surfaces. Proper board spacing is your first line of defense, but your choice of hardware is just as important. Using the wrong screws can lead to loose boards and wobbly rails down the road. Always use exterior-rated screws and structural connectors designed for outdoor use. Stainless steel or specially coated fasteners will prevent rust and corrosion, extending the life of your deck. These small details make a huge difference in the safety and durability of your final build, preventing costly repairs in the future.
Install Railings and Stairs
If your deck is more than 30 inches above the ground, Utah building codes require you to install a railing for safety. But railings are more than just a requirement; they are a major design element that defines your deck’s style. From classic wood to modern cable or composite materials, your choice will shape the final look and feel of your space. When installing stairs, ensure the risers and treads are uniform and easy to climb. Securely installed custom railings and stairs provide peace of mind and give your deck a polished, professional appearance.
Seal Cut Ends to Protect Against Moisture
Here’s a pro tip that many DIYers miss: always seal the cut ends of pressure-treated wood. While the surface of the lumber is treated to resist moisture and decay, any cut you make exposes the untreated interior. This raw wood acts like a sponge, soaking up water and creating a weak point for rot to set in. Before you install each board, apply a wood preserver to every cut end with a brush. This simple, quick step is one of the most effective ways to protect your investment and ensure every part of your deck frame and decking is protected from the elements.
Common Deck Construction Mistakes to Avoid
Building a deck yourself is incredibly rewarding, but a few common missteps can turn your dream project into a headache. Even seasoned DIYers can make mistakes that compromise the safety, stability, and lifespan of their deck. The good news is that these errors are completely avoidable with a little planning and know-how. Let’s walk through some of the most frequent pitfalls so you can build with confidence and create an outdoor space that lasts for years to come.
Skipping Permits and Ignoring Building Codes
I know, paperwork is the least exciting part of any project. It’s tempting to skip the permit process and jump straight into building, but this is a mistake you don’t want to make. Local building codes exist for one primary reason: safety. They ensure your deck is structurally sound and won’t pose a risk to your family and friends. Imagine finishing your beautiful deck only to be told you have to tear it down because it violates a zoning rule. It happens! Taking the time to obtain the proper permits from your city or county office protects your investment and gives you peace of mind.
Using the Wrong Fasteners or Hardware
The small details, like screws and connectors, make a huge difference in your deck’s durability. Using interior-grade screws or skipping structural hardware might save a few dollars upfront, but it can lead to wobbly railings, loose boards, and serious safety hazards down the road. For a deck that stands strong against Utah’s weather, always use fasteners rated for exterior use. Look for stainless steel or specially coated screws and galvanized joist hangers to prevent rust and corrosion. Proper hardware is essential for a secure structure, especially for features like your custom railing.
Poor Footing Placement and Ledger Board Errors
A deck is only as strong as its foundation. One of the most critical errors is setting footings too shallow. Here in Utah, footings must be placed below the frost line to prevent your deck from shifting and becoming unstable as the ground freezes and thaws. Another common mistake is improperly attaching the ledger board, which connects the deck to your house. A poorly secured ledger board is a primary cause of deck collapse. When you build your custom deck, make sure your footings are deep, level, and properly spaced. Also, never bury wood posts directly in the soil; they should sit on concrete footings that extend a few inches above the ground to prevent rot.
Neglecting Drainage and Ventilation
Water is the natural enemy of any wood structure. If water is allowed to pool on or under your deck, it will inevitably lead to rot, mold, and a slippery, unsafe surface. Proper drainage starts from the ground up, ensuring the land beneath your deck slopes away from your house. It also involves leaving a small, consistent gap between your deck boards to allow water to run through instead of sitting on top. Just as important is ventilation. Good airflow underneath the deck helps everything stay dry and prevents moisture buildup. A well-designed deck that accounts for these factors will look great and last much longer, as you can see in our project gallery.
How to Maintain Your Deck for Safety and Longevity
Building your deck is a huge accomplishment, but the work doesn’t stop once the last board is fastened. To protect your investment and ensure it remains a safe, beautiful spot for years to come, regular maintenance is essential. Think of it as routine care that keeps your outdoor living space in top shape, ready for every barbecue, morning coffee, and quiet evening. A well-maintained deck isn’t just about looks; it’s about preserving the setting for future family memories. You can see some beautiful examples in our gallery of completed projects.
In Utah, where our decks face everything from intense sun to heavy snow, this upkeep is even more critical. The changing seasons can take a toll on wood and composite materials alike. A little attention each season goes a long way in preventing costly repairs and extending the life of your deck. Following a simple maintenance schedule will help you catch small issues before they become big problems, giving you peace of mind and more time to enjoy your hard work. It’s the best way to make sure your deck is always ready for relaxation or entertaining at a moment’s notice.
Seasonal Cleaning and Inspection Checklist
At the start of spring and end of fall, give your deck a thorough check-up. Start by clearing away all furniture, planters, and debris. Give the surface a good sweep, then gently wash it with a deck cleaner or a simple soap and water solution. While you’re cleaning, keep an eye out for any potential problems. Regularly check for signs of rot, mold, or insect damage, especially in areas that tend to stay damp. Look for loose boards, wobbly railings, and any structural issues that may have developed. Pay close attention to the hardware; tighten any loose screws or bolts to keep everything secure. This simple inspection is your first line of defense in keeping your deck safe and sound.
Know When to Seal, Stain, and Repair
Sealing or staining your deck is crucial for protecting the wood from moisture and UV damage, which is especially important under the strong Utah sun. If you built your deck with pressure-treated wood, you must wait for it to dry completely before applying a finish, which can take a few weeks or more. A simple way to check is to sprinkle some water on the boards. If the water soaks in quickly, the wood is ready. If it beads up, give it more time. Most wood decks need a fresh coat of sealer every one to three years. For minor repairs, like replacing a single damaged board, it’s best to handle it right away to prevent further issues.
When to Call a Professional Deck Contractor
While many maintenance tasks are perfect for a DIY weekend, some problems require an expert eye. If your inspection reveals significant structural issues, like widespread rot, a sagging frame, or problems with the footings, it’s time to call for help. The same goes for a wobbly deck or railings that feel unstable, as these are serious safety hazards. If you discover your deck might not be up to local building codes, a professional can help you find a solution. Don’t hesitate to contact a licensed contractor if a repair feels beyond your skill set. Making a smart call to a professional ensures the job is done right and your deck remains a safe place for your family.
Frequently Asked Questions
How much should I budget for a new deck? The final cost of a deck can vary quite a bit, so it’s tough to give a single number. Your biggest cost factors will be the size of the deck, the materials you choose (composite decking is more expensive upfront than pressure-treated wood), and the complexity of the design. Things like built-in benches, multiple levels, or intricate railing systems will also add to the price. The best way to get a clear financial picture is to finalize your design and then get a detailed quote from a professional.
Is it better to build a deck myself or hire a contractor? This really comes down to your skill level, the tools you have, and how much time you can commit. A simple, freestanding, ground-level deck might be a manageable project if you have solid construction experience. However, for any deck attached to your house, a multi-level design, or if you want the peace of mind that comes with professional craftsmanship, hiring a licensed and insured contractor is the wisest choice. They handle the permits, ensure the structure is safe and up to code, and can complete the job much more efficiently.
Is composite decking really maintenance-free? While composite decking is incredibly low-maintenance compared to wood, it isn’t completely maintenance-free. The great news is you can forget about sanding, staining, or sealing it every year. However, it does need regular cleaning with soap and water to remove dirt, pollen, and prevent any mildew from forming, especially in damp or shady spots. A simple seasonal wash is usually all it takes to keep it looking great.
What actually happens if I build a deck without a permit? Skipping the permit process can lead to some serious headaches. Your local building department could hit you with fines and even issue a stop-work order. In a worst-case scenario, they could require you to tear the entire deck down. It can also create major problems when you try to sell your home, and if an accident were to happen on the unpermitted structure, your homeowner’s insurance could deny the claim. It’s a risk that just isn’t worth taking.
How long does it take to build a deck from start to finish? The timeline depends on several factors. The planning and design phase can take a week or two, depending on how quickly you make decisions. After that, waiting for your local building department to approve the permit can take anywhere from a few days to several weeks. Once construction begins, a standard deck can often be built in about one to two weeks, but larger or more complex projects will take longer. Weather can also play a role, so it’s good to build some flexibility into your schedule.